Quick Methods to Recover Photos From a Formatted SD Card
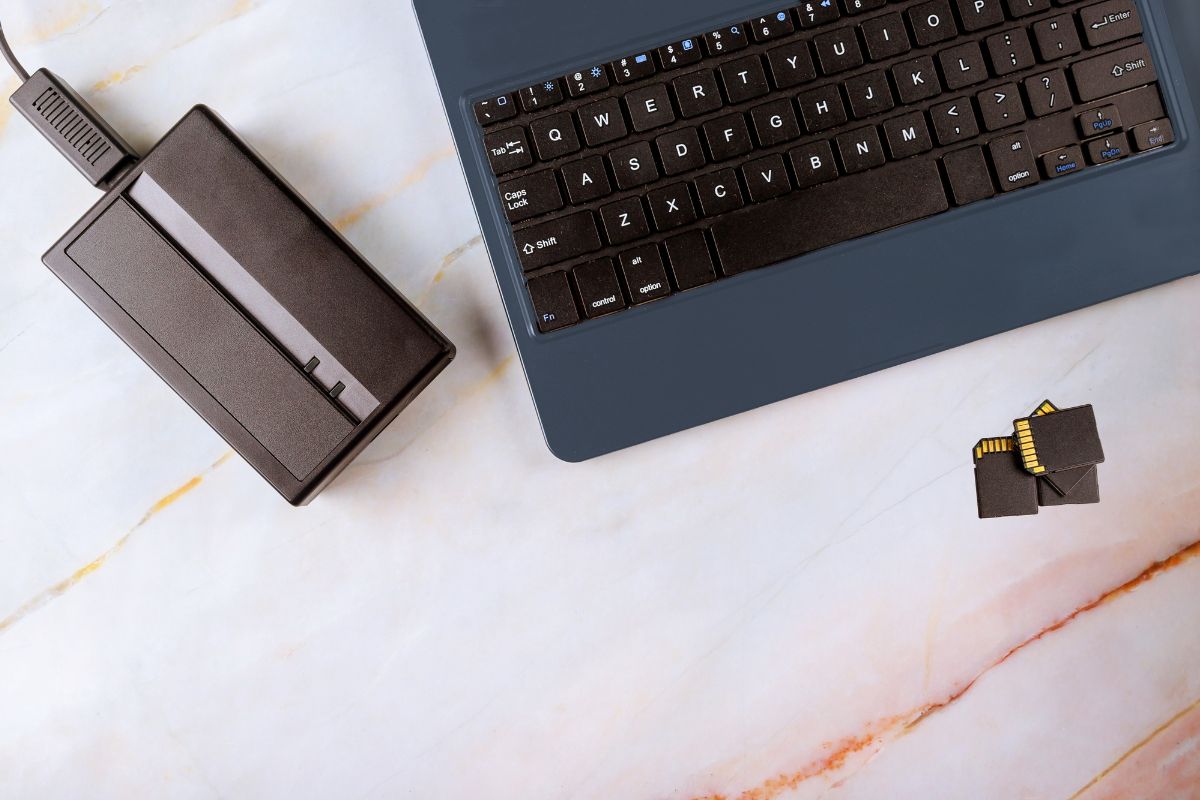
Have you ever wiped your SD card clean and then realized you deleted some important photos? Don’t worry, it’s not the end of the road for your pictures. With some handy tools and a few steps, you can get those photos back from your SD card. This guide will walk you through the process, showing you how to bring back your memories, whether you do it by yourself or with the help of photo recovery software.
Table of Contents
Immediate Action after Photo Loss from Formatted SD Cards
When you format your SD card, it’s a bit like your photos are playing hide and seek—they’re not really gone, they’re just hiding. The card is now ready for new pictures or files, but your old photos are still there in the background. That’s where SD card recovery comes in. It’s like a rescue mission to bring back those hidden photos before anything new can take their place. So, remember, stop using the card right away to give your SD card recovery the best chance of success.
Quick Methods to Recover Lost Photos from Formatted SD Cards
Losing photos from your SD card can be a bummer, but getting them back is doable with the right steps. Here’s a simple way to use photo recovery software to bring back your lost memories:
Method 01: Use Third-Party Photo Recovery Software
One of the simplest methods for photo recovery is to use a program designed for this job. Stellar Photo Recovery is one such tool that’s really handy. It works with all kinds of storage, like your SD cards, computer hard drives, and USB sticks. This software is pretty smart. It can find photos you lost for all sorts of reasons, whether you accidentally hit ‘delete’ or had some other mishap.
The cool part is you can peek at the photos it finds before you decide to save them back onto your computer. That way, you only keep the ones you want. Here’s a quick rundown on how to use Stellar Photo Recovery to get your photos back:
Step 1: First, get the Stellar Photo Recovery program onto your computer. Then, using a card reader, hook up your SD card to the computer. Open the program, pick your SD card, and hit ‘Scan’.


Step 2: After the scan finishes, you’ll see a bunch of files that you can get back. Look through them and tick the boxes for the photos you want.


Step 3: Now, just click on ‘Recover’ and choose where on your computer you want to save these photos.


Method 02: Get Back Photos from Your SD Card with CMD
If you’re comfortable using your computer’s command center, you can try this method to find your lost photos on an SD card. Here’s how to do it in simple steps:
- Open the Command Center: Click on the search bar on your computer, type in CMD, and you’ll see ‘Command Prompt’. Right-click on it and choose ‘Run as Administrator’. This is like asking for the keys to the control room.
- Type the Magic Words: Now, you’ll see a black box where you can type commands. Here, you’ll type chkdsk G: /f /x /r but replace ‘G’ with the letter that your computer uses for your SD card. This command is like a detective that starts looking for your photos.
- Press Enter: After typing the command, hit the Enter key, and the search begins. Your computer will start scanning the SD card and try to fix any problems it finds along the way.
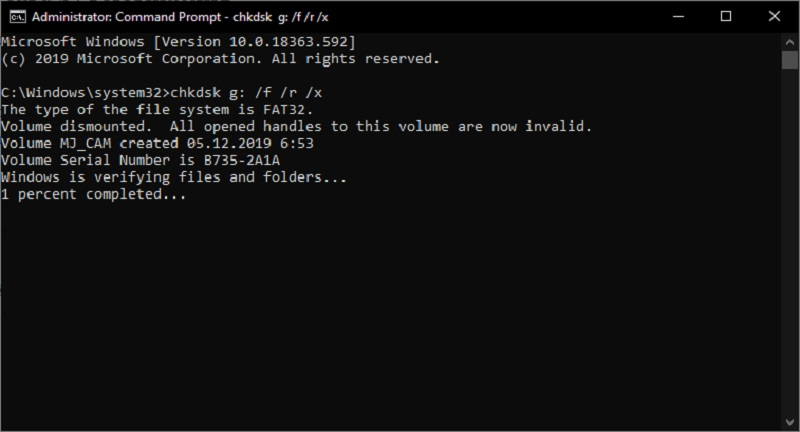

Remember, this method is a bit more technical, so it’s good for those who feel confident with computers. If you follow these steps, you might just get your photos back without needing any extra software
Method 03: Bring Back Photos with Windows Backup
Windows has a handy tool called File History that keeps copies of your files, just in case. If you’ve lost photos from your SD card, here’s how to get them back with it:
- Find File History: Click on the search bar at the bottom of your screen and type in ‘File History’. Then click on ‘Restore your files with File History’.
- Look for Your Photos: A window will pop up with all the backups. Click on the folders until you find where your photos used to be.
- Pick Your Photos: Once you find your photos, you can select the ones you want to bring back to your computer.
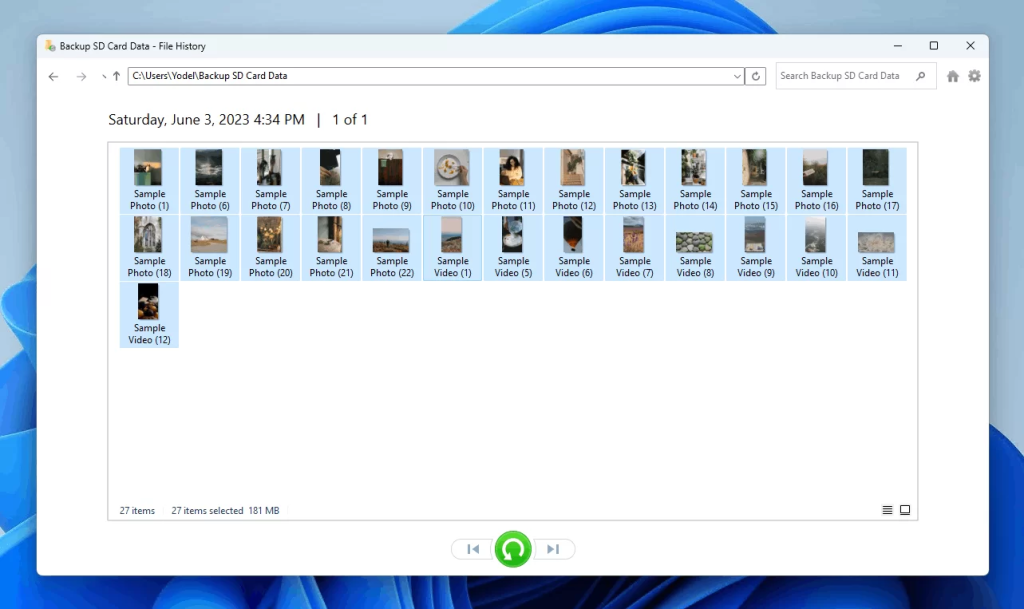

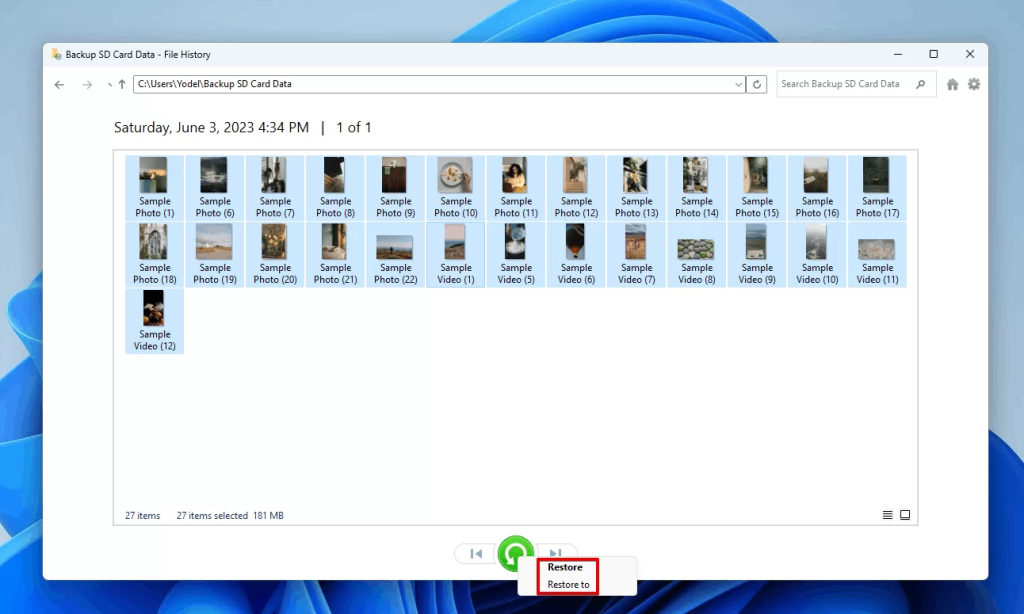
- Save Your Photos: Right-click the green Restore button and choose ‘Restore’ to save the photos back to their original place, or ‘Restore to’ if you want to save them somewhere else.
And that’s it! With these steps, you can use Windows Backup to find and restore your photos without any fuss.

Tips to Prevent Future Data Loss from SD Card
Keeping your photos safe is a lot like taking care of precious memories. Here are some simple tips to help you avoid losing them in the future:
- Regularly Backup Your Photos: Think of backups like keeping spare keys. Store copies of your photos in different places—online in the cloud, on an external hard drive, or on your computer. This way, if you lose some, you’ll have extras ready to go.
- Avoid Frequent Formatting: Formatting your SD card is like erasing a chalkboard. Do it too often, and you might accidentally erase something important. So, check twice before you format to make sure you’re not wiping away any special photos.
- Use Reliable SD Cards: Choose a good-quality SD card like you’d pick a sturdy suitcase for a long trip. A strong, reliable card from a well-known brand is less likely to break down and lose your photos.
- Update and Maintain Devices: Keep your camera or phone in tip-top shape like you would with a car. Regular updates can help everything work better together and keep your photos safe.
By following these steps, recovering deleted photos should be something you won’t need to worry about too often. Just a little care can go a long way in keeping your snapshots safe.
Wrapping Up
Getting your photos back from a formatted SD card doesn’t have to be hard if you’ve got the right tools for the job. Just remember to act fast—don’t put new stuff on the card if you want the best shot at getting your old photos back.
You can use the backup system that comes with Windows or a special program like Stellar Photo Recovery. Just follow the directions closely. Plus, if you keep your photos backed up and take good care of your SD card, you shouldn’t have to worry about losing them again. Stay safe and keep snapping those pics!
May 1, 2024


