Best 5 Android Camera Tricks

August 9, 2022
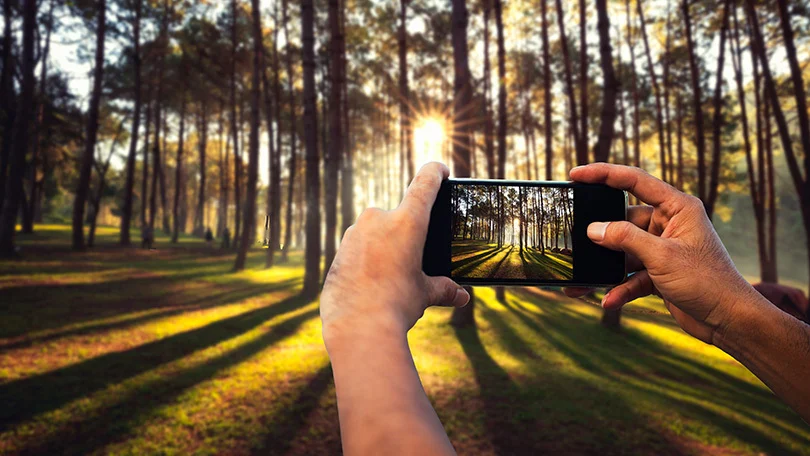
As far as taking pictures with a camera for virtual fun is concerned, you can never go bad with a good selfie or a unique gathering representation. Be that as it may, why not excite things every once in a while with creative telephone photography? You don’t need to bother being an expert picture taker to pump up innovative energy. You can do some incredible things with your telephone alone. The best part is that these photograph stunts don’t expect you to leave the house – so whether you’re in the snow or safe, you can access a universe of fantasy without leaving the entrance. In the case of nothing else. Somewhere during or around the past ten years, we’ve seen the small camera market slow down, the photo-sharing explosion, and cell phones evolve into the main cameras around. Also, camera execution has evolved in the main part of these phones. No need to focus on call clearance, it’s all about the quality of the photograph.
We’re not saying there’s no room for actual cameras anymore – far from it – although, for the layman customer, the cell phone has turned into the go-to camera. Whether you have the most expensive Leider iPhone or the least expensive section-level Android, we’ve gathered some top tips to make sure you’re getting the most from your phone’s camera.
Table of Contents
1. A Composite Image
A composite image is an image that contains parts of several images put together. In this case, we take our image of Dr. Seuss’ book “Green Eggs and Ham” along with our image of the ocean. We select both images and then combine them using Adobe Photoshop Elements to create a unique image. Now that you have established your base, begin adding details and elements to your artwork. Think about what information you want to convey about your subject matter. Consider how you might incorporate symbols that represent ideas related to your topic. Remember to keep the number of details in the forefront; fewer details mean greater focus, while more details draw attention away from the central idea.
2. Color Adjustment
The green eggs and ham comic was taken in black and white, while the ocean picture was taken in color. To make these two pieces of art fit together, we use Photoshop Elements 8’s adjustment layers feature to change the colors of the image. By changing only the background color to white and applying the adjustment layer over the top, we can easily merge the two images. Finally, you’ll have to pick your starting point. If you already have a color palette in mind, go ahead and start painting from there. Otherwise, take a photo of a flower or object and pull colors directly from the picture. Make sure not to oversaturate colors or add too many shadows — just enough to get the desired effect.
3. Removing Objects
Since we want to keep some objects in the original photo, we remove the boat in the top left corner so that everything else fits together well. We can do this by pressing Ctrl + T on Windows or Cmd + T on Mac to bring up the transform tool. Next, click on the marquee tool (the red dotted line) and drag out the items you wish to remove from the image, including the boat. Once you have removed the unwanted objects, you can either delete the ones you selected or save them to a separate file.
4. Adding Text
We add text to the image by selecting the type tool in the tools palette, clicking on the typeface we desire, and typing in the desired text. You can choose any font you like, but if you know nothing about typography, you might consider choosing a simple sans serif or monospaced font. The type size should be set to around 40-55% of the height of the image. Photoshop is an amazing software tool that many people use to create images and animations. Many designers, photographers, and artists find Photoshop to be their favorite software. If you want to add text to an image, then you should know how to do it in Photoshop. There are several photography ideas also that allow us to manipulate images.
5. Saving the File
After saving the file, we go back to the file folder where we saved the file and rename it to be something creative. If you’d like to save the file on your desktop as opposed to the default location of the Desktop, you can right-click anywhere on the desktop and select New Folder. Then navigate to the location you would like to place the file and name.
Once we knew that the backups were being done regularly, we started looking into fixing the problem ourselves. If you’re using Windows 7, there are two ways to fix broken files. You can either use a third-party software program or just search online for solutions.
For us, we used a free tool called CCleaner. There are many programs that claim to be able to clean up your computer, but only CCleaner was actually tested by Microsoft themselves. So we decided to give it a try.
Get your daily dose of news and insights - add us on Google News and never miss any story

August 9, 2022
By Sahil Khan

Jul 26, 2024
Making Customer Insights More Re...


Jul 26, 2024
Notorious Mexican Drug Lord R...


Jul 25, 2024
Fragrantica: A Website to Find Y...


Jul 24, 2024
Discover the Playful and Interac...

Jul 23, 2024
Essential Time to Book Burj Khal...

Jul 17, 2024
Guess I Lost My Virginity to a C...
Jul 16, 2024
Baby Pigeons: Everything You Nee...

Jul 15, 2024
Tips to Design a Website That Co...

Jul 12, 2024
Meet Jeremiah Peniata Fatu’...

Jul 11, 2024
Recognizing Market Trends –...


Jul 11, 2024
From Cattle Prods to Goads on NY...

Jul 10, 2024
What Does HP Petrol Full Form?